
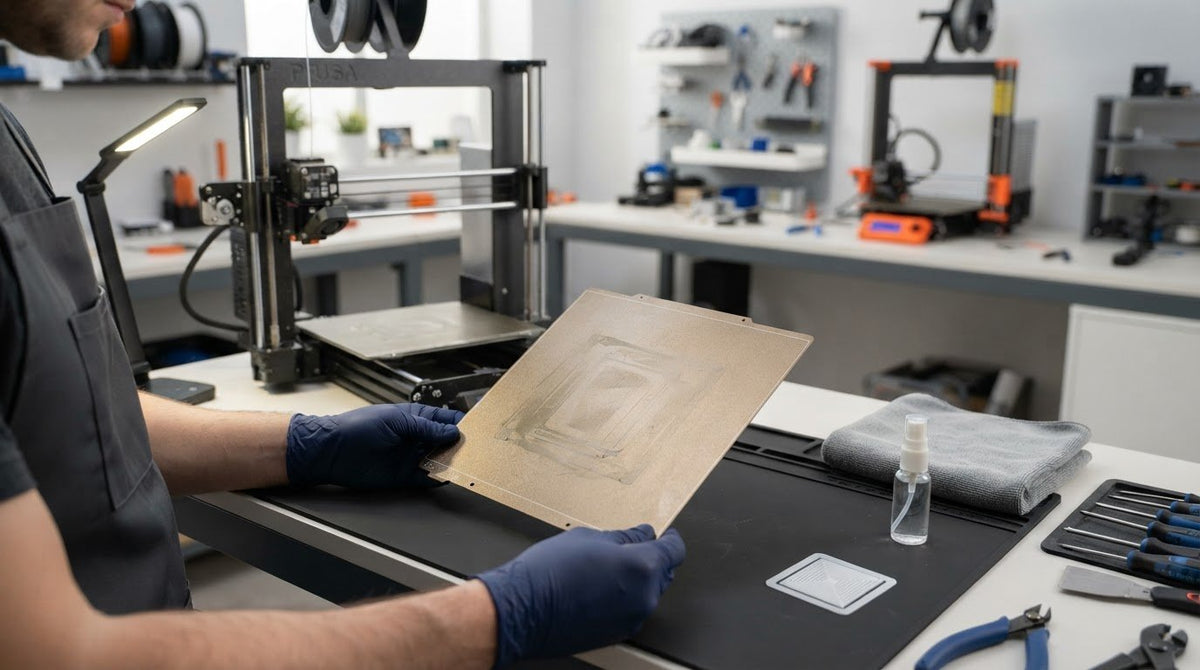
When prints start detaching or warping, the fix may not be more IPA or a rougher scrub. Spring steel PEI build plate adhesion restoration starts with identifying the cause, which could be residue, printer setup, or a worn coating.
It’s sensible to be cautious: the wrong cleaner or abrasive can damage PEI, and repeated IPA wipes may not remove every contaminant. This guide explains how to diagnose the problem first, then choose a safe restoration method for your surface. You’ll learn how to improve first-layer grip without risking unnecessary wear.
We’ll cover checks for bed leveling, nozzle height, and temperature, then explain how to clean smooth and textured PEI differently. You’ll also learn when gentle mechanical refreshing may be appropriate, when a plate is too worn to restore, and how to reduce the chance of adhesion failures returning.
Key Takeaways
- Prints lifting or shifting can result from residue, surface wear, or first-layer setup. Identify the likely cause before changing the plate.
- Distinguish smooth, satin, and textured PEI before choosing a cleaning or restoration method. The wrong treatment can damage the surface.
- Use a controlled process for spring steel PEI build plate adhesion restoration: inspect, clean with a method suited to the finish, dry fully, then reinstall.
- Run a small first-layer test to check contact across the plate before committing to a longer job.
- Handle the sheet by its edges and follow the printer and filament manufacturers’ guidance to help prevent adhesion problems from returning.
Why Has Your Spring Steel PEI Build Plate Lost Adhesion?
A print that once held firmly may now lift at the corners, shift during printing, or release before the job is finished. These symptoms can point to a PEI surface issue, but they don’t prove the plate is the cause. Fingerprints, filament residue, coating wear, and first-layer setup can all lead to similar failures. Since the build plate supports the first deposited lines in Fused Deposition Modeling, even a small difference in contact can affect the whole print.
Temporary contamination can often be cleaned away, while visible coating damage or persistent failures in the same worn area may mean the surface has permanently changed. Before starting spring steel PEI build plate adhesion restoration, note where and when the failure occurs. Then change one variable at a time. If you clean the plate, adjust nozzle height, and change temperature all at once, you won’t know which action helped.
Which first-layer symptoms point to an adhesion problem?
Inspect the failed print and note where the problem occurs. Corners that curl upward early often indicate poor grip or uneven cooling. Lines that look rounded, separated, or easy to pull apart can mean the first layer isn’t bonding well. If the first layers appear secure but the print releases later, movement, warping, or other print conditions may be involved.
A calibration pattern can look clean without covering the footprint of a real print. A larger model may cross areas the test missed, exposing localized residue, wear, or uneven contact. Check whether failures happen across the whole plate or recur in one region. A consistent problem in one spot is a useful clue, but it doesn’t prove the entire sheet needs treatment.
Could printer settings be the cause instead of the PEI sheet?
Check the nozzle-to-bed distance, first-layer speed, and bed temperature against the printer manufacturer’s guidance for your machine, plate, and filament. Confirm that the selected build-plate profile matches the surface installed. A profile mismatch can affect the first layer even when the plate is clean.
Inspect the nozzle for residue that could disrupt extrusion, and check that the filament is in suitable condition for printing. Then run a small first-layer test before changing another setting. If the result improves after one adjustment, you’ve narrowed down the cause. If failures continue in the same plate area after checking setup and cleanliness, inspect that spot for visible wear or damage.
Identify Your PEI Surface Before Choosing a Restoration Method
Spring steel describes the flexible metal sheet; PEI is the coating or surface layer that helps the first layer grip. Before spring steel PEI build plate adhesion restoration, identify the finish. A cleaner or abrasive suitable for one surface may damage another, so don’t choose a treatment based on appearance alone.
How can you tell smooth PEI from textured or satin PEI?
Inspect the plate under good light and at a shallow angle. Smooth PEI looks relatively flat and reflective, while textured PEI has a visible pebbled pattern that scatters light. Satin finishes usually fall between the two, with a finer, less pronounced texture than a clearly textured plate. If you’re unsure, check the plate label or printer documentation rather than guessing.
The finish affects how the first layer contacts the surface and which cleaning methods are suitable. A chemical or abrasive tolerated by one type may harm another. Follow the plate maker’s care instructions before trying stronger treatments. ASTM’s industry standards provide broader additive-manufacturing context, but plate-specific maintenance guidance should determine how you care for your sheet.
- Smooth: The surface appears flat and may look glossy. Start with the manufacturer’s approved routine cleaner. Stop if you see peeling, deep scratches, or exposed metal.
- Satin: The surface has a subtle, fine-grained appearance. Use only care methods approved for that plate. If the finish or instructions are unclear, don’t try an abrasive treatment.
- Textured: A raised, pebbled pattern is visible. Begin with the maker-approved cleaning method and avoid treatments prohibited for the coating. Stop if the texture is visibly worn or damaged.
What should you check before cleaning or abrading the plate?
Turn off the printer, remove the flexible sheet, and let it cool before handling or cleaning. Check the manufacturer’s instructions for approved cleaners and prohibited treatments. For example, manufacturer guidance for textured PEI recommends warm water and dish soap and warns against acetone, while smooth PEI care can differ. Don’t assume a method applies to every finish.
Avoid metal tools, aggressive sanding, and abrasive treatments that aren’t confirmed for your exact plate. Scraping or roughening the surface can turn a removable residue problem into permanent coating damage. If you’re learning printer setup and maintenance, Additronix offers 3D printer installation and training alongside its hardware and materials.
Compare PEI Adhesion Restoration Methods by Benefit and Risk
Choose the least aggressive method that follows the plate maker’s care instructions. For many textured PEI plates, manufacturer guidance starts with warm water and a small amount of dish soap. A quick IPA wipe can help with routine cleaning on surfaces that approve it, but may not remove every oily or stubborn residue. For spring steel PEI build plate adhesion restoration, consider stronger treatments only after gentle cleaning fails and surface-specific instructions allow them.
When should you use dish soap, water, or isopropyl alcohol?
Dish soap and warm water: When approved for the plate, wash it with clean hands and a non-abrasive sponge or soft brush. Use a small amount of dish soap, rinse thoroughly, and let the sheet dry completely before reinstalling it. Soap can loosen greasy fingerprints and residue that a quick solvent wipe may leave behind.
Isopropyl alcohol (IPA): Use it for a quick wipe only if the plate manufacturer permits it. Apply it with a clean, lint-free cloth, then wait until the surface is fully dry before printing. IPA can remove light surface oils, but repeated wiping isn’t guaranteed to remove embedded grease or accumulated residue. When permitted, a thorough wash may be the better next step.
When should you avoid acetone, abrasives, or adhesion aids?
Acetone is not a universal PEI cleaner. Use it only when the maker explicitly approves it for that plate and finish. Some smooth PEI instructions allow occasional use, while textured PEI guidance may prohibit it. Acetone is flammable, so follow the product safety instructions and keep it away from heat and open flames.
Abrasives carry lasting risk. Sanding or scrubbing can alter the texture or remove the coating, so don’t try it unless the plate maker specifically recommends an appropriate method. Avoid metal tools and unverified abrasive pads. If the surface shows substantial wear or coating damage, stop rather than trying to grind it back into condition.
Adhesion aids aren’t restoration. Glue stick or another release layer may be useful with materials that can bond too strongly to PEI, such as PETG or TPU, when printer or filament guidance recommends it. The layer can help protect the plate during print removal, but it doesn’t clean or restore the PEI beneath it. Keep the purposes separate: clean the surface to remove contamination, and use an aid only for a specific material-related reason.
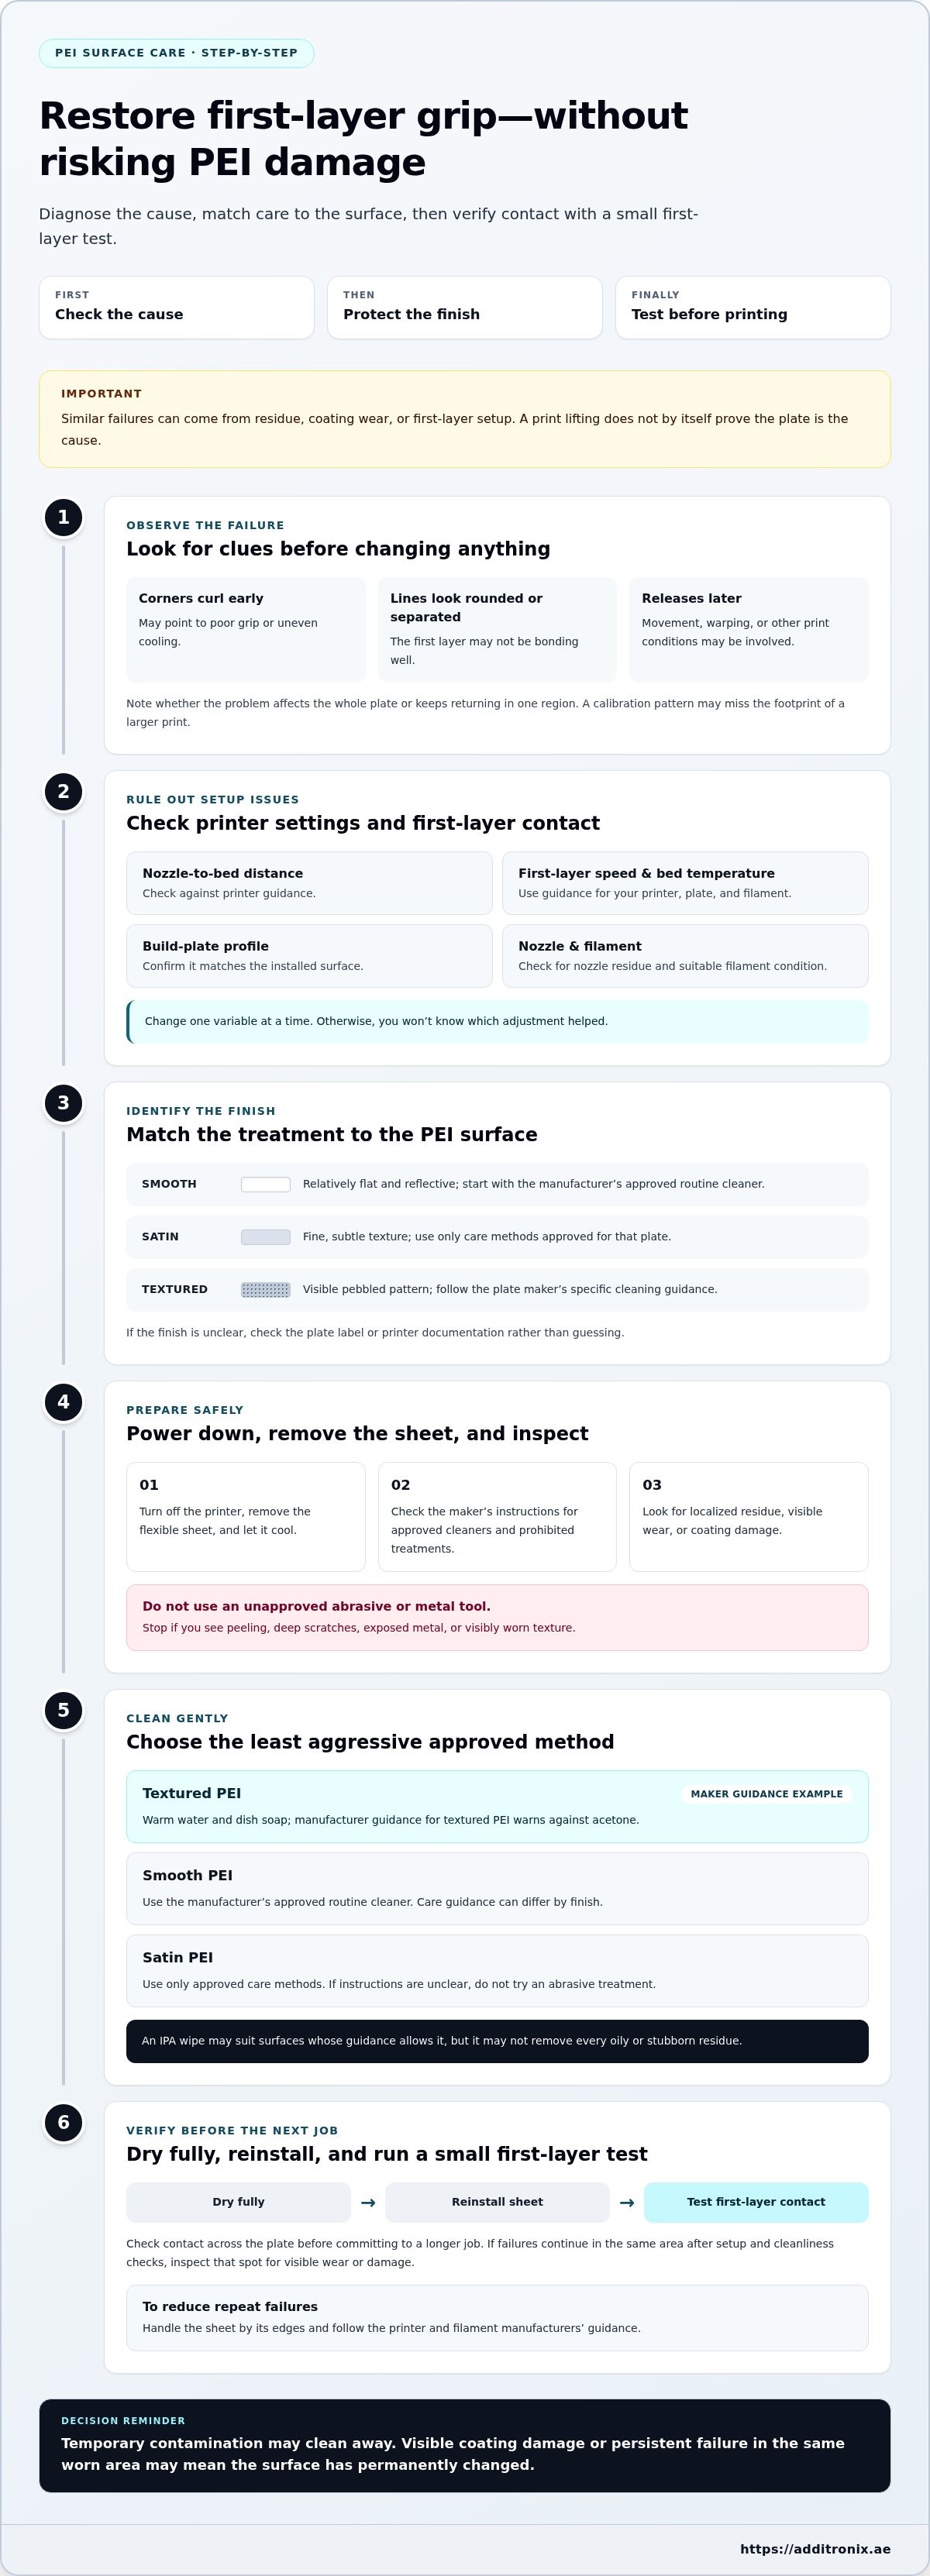
Restore Spring Steel PEI Adhesion with a Controlled Test Process
Use a repeatable sequence to find out whether cleaning resolves the problem before adjusting printer settings. This approach makes spring steel PEI build plate adhesion restoration safer and easier to diagnose.
What is the safest order for cleaning and retesting?
- Identify the surface. Confirm whether the plate is smooth, satin, or textured by checking its label or printer documentation.
- Inspect the coating. Look for residue, scratches, peeling, bubbles, or areas where the surface appears uneven. Don’t abrade the plate to address ordinary contamination.
- Wash if approved. Use the least aggressive method permitted by the plate maker. If washing, use clean hands and a non-abrasive sponge or soft brush, then rinse thoroughly.
- Dry completely. Let the sheet air-dry or use a clean, lint-free cloth if the manufacturer allows it. Avoid touching the cleaned print area, since fingerprints can add fresh oils.
- Reinstall and test. Seat the cool sheet correctly on the bed, select the matching build-plate profile, and run a small, repeatable first-layer test before starting a full-size print.
Check whether the test lines make consistent contact across the area they cover. If the print still fails, adjust only one relevant setting at a time, such as nozzle-to-bed distance, first-layer speed, or bed temperature. Leave other settings unchanged and repeat the same test. This makes it easier to tell whether the adjustment helped.
How do you tell whether the surface is worn or damaged?
Inspect the plate under good light for peeling, bubbling, deep scratches, exposed metal, or an inconsistent coating. A failure that repeatedly occurs in one localized spot, even after approved cleaning and setup checks, may point to local wear. Adhesion loss across different areas can suggest residue or a broader setup issue, although neither pattern alone proves the cause.
Stop if the coating is visibly damaged or peeling. Don’t sand, scrape, or use a stronger chemical to try to repair it. Follow the plate maker’s replacement advice or seek its guidance before printing again. Careful maintenance of the printer, plate, and filament helps keep the whole setup working together. For practical help with printer setup and operation, explore 3D printer installation and training.
Keep PEI Adhesion Reliable and Choose the Right Next Step
Reliable adhesion comes from consistent handling and a well-matched print setup, not from repeatedly applying stronger treatments. For lasting spring steel PEI build plate adhesion restoration, keep the surface clean, follow its care instructions, and track changes when a print begins to fail again.
Which habits help prevent adhesion from declining again?
Handle the sheet by its edges to keep skin oils off the active print area. If you notice fingerprints, dust, or leftover filament, clean the plate using a method approved for its finish rather than waiting for repeated print failures. Avoid unnecessary chemicals and abrasive scrubbing. Each treatment can affect the surface differently, and extra cleaning isn’t automatically better.
Recheck first-layer calibration after relevant changes, such as reinstalling or replacing the plate, changing printer setup, or switching to a different build-plate profile. Match the plate selection and slicer settings to the filament and printer manufacturer’s guidance. A simple record of the filament, plate area, settings, and recent changes can help reveal whether failures follow a particular material, location, or adjustment.
When is cleaning not enough to solve the problem?
If adhesion remains unreliable after appropriate cleaning, look beyond the surface. Confirm calibration and nozzle-to-bed distance, check that bed temperature suits the filament and plate, and review the slicer profile. Also consider filament condition. Change one variable at a time and note the result so you can identify what actually improves the first layer.
Persistent failure in one area may point to localized wear, while problems across the plate can have several causes, including setup or contamination. Neither pattern is conclusive by itself. If the coating is peeling, visibly damaged, or remains inconsistent after cleaning and setup checks, stop abrasive or chemical experiments. Follow the plate maker’s guidance on whether the sheet should be replaced.
Good maintenance protects the build surface and helps maintain print quality. Explore Additronix’s 3D-printing hardware and materials to support your next project with equipment, filaments, and resins.
Build Reliable First Layers with a Safer Routine
Restoring grip starts with diagnosis, not aggressive scrubbing. Identify whether the cause is contamination, plate wear, or printer setup, then choose a cleaning method approved for your specific PEI finish. A small first-layer test helps confirm the result before you commit to a longer print.
Keep the sheet clean by handling it at the edges, and change only one setting at a time if adhesion remains inconsistent. This measured approach to spring steel PEI build plate adhesion restoration helps protect the coating while making recurring problems easier to trace.
For your next project, explore Additronix 3D-printing hardware and materials, including 3D printers, accessories, spare parts, filaments, and resins. Professional installation and training can also support your 3D-printing setup. Visit Additronix to find equipment and materials for your project and get support with installation and training.
Frequently Asked Questions
How do you restore adhesion on a spring steel PEI build plate?
Start by identifying whether the PEI surface is smooth, satin, or textured, then inspect it for residue and visible damage. Clean it using a method approved by the plate manufacturer, dry it fully, reinstall it, and run a small first-layer test. If adhesion still fails, check calibration, nozzle height, bed temperature, and the selected plate profile. This controlled approach to spring steel PEI build plate adhesion restoration helps avoid unnecessary chemical or abrasive treatment.
Can you clean a PEI build plate with isopropyl alcohol?
Yes, if the plate manufacturer approves it for that surface. IPA can be useful for a quick wipe, especially on smooth PEI, but it isn’t guaranteed to remove stubborn grease or accumulated residue. Use a clean, lint-free cloth and let the plate dry completely before printing. For textured PEI, check the manufacturer’s cleaning instructions first, as warm water and dish soap may be the preferred option.
Is dish soap safe for a textured PEI sheet?
Warm water and a small amount of ordinary dish soap are recommended for cleaning many textured PEI plates, provided the plate maker’s instructions allow it. Wash the cool, removed sheet with clean hands and a non-abrasive sponge or soft brush, then rinse thoroughly and let it dry fully. Avoid soaps with oils or moisturizers, which can leave residue. Don’t use acetone on textured PEI unless the manufacturer explicitly approves it.
Can you use acetone on a PEI build plate?
Use acetone only if the plate manufacturer explicitly approves it for your exact PEI surface. Some smooth PEI care instructions allow occasional use for stubborn adhesion problems, but overuse may make the coating brittle. Textured PEI can be damaged by acetone, so don’t assume guidance for smooth sheets applies. Acetone is highly flammable; follow its safety instructions, work with good ventilation, and keep it away from heat and flames.
Should you sand a PEI build plate to improve adhesion?
Sanding should be a last resort, not a routine cleaning step. Abrasion can alter the surface texture or remove the PEI coating, and methods suitable for one finish may damage another. Clean the plate using its approved method first, then test adhesion and check printer setup. Consider abrasion only if the plate manufacturer recommends a specific approach for that surface. Stop if you see peeling, exposed metal, or deep scratches.
Why is PLA not sticking to a clean PEI sheet?
A clean plate doesn’t rule out a first-layer or material issue. Check bed leveling and nozzle-to-bed distance, then confirm that first-layer speed and bed temperature follow your printer and filament guidance. Make sure the slicer’s build-plate profile matches the installed surface, and inspect the nozzle for residue. For PLA, a 55-60°C bed is a common PEI starting range, but follow your printer and filament manufacturer’s recommendations.
How can you tell when a PEI build plate needs replacing?
Look for coating that peels or bubbles, deep scratches, exposed metal, or clear wear in the printing area. If adhesion remains inconsistent in the same damaged region after approved cleaning and setup checks, the coating may no longer be serviceable. PEI sheets are consumable parts, and cleaning can’t restore missing or peeling coating. Stop aggressive treatment and follow the plate manufacturer’s advice on replacement or, if permitted, using the other side.
Does glue stick restore adhesion on a PEI build plate?
No. Glue stick adds a temporary layer; it doesn’t clean or restore the PEI underneath. It may be recommended as a release layer for materials such as PETG or TPU that can bond too strongly to PEI and damage it during removal. Use an adhesion aid only when the printer or filament guidance calls for it. For poor grip caused by residue, contamination, or setup, address the underlying cause instead.