
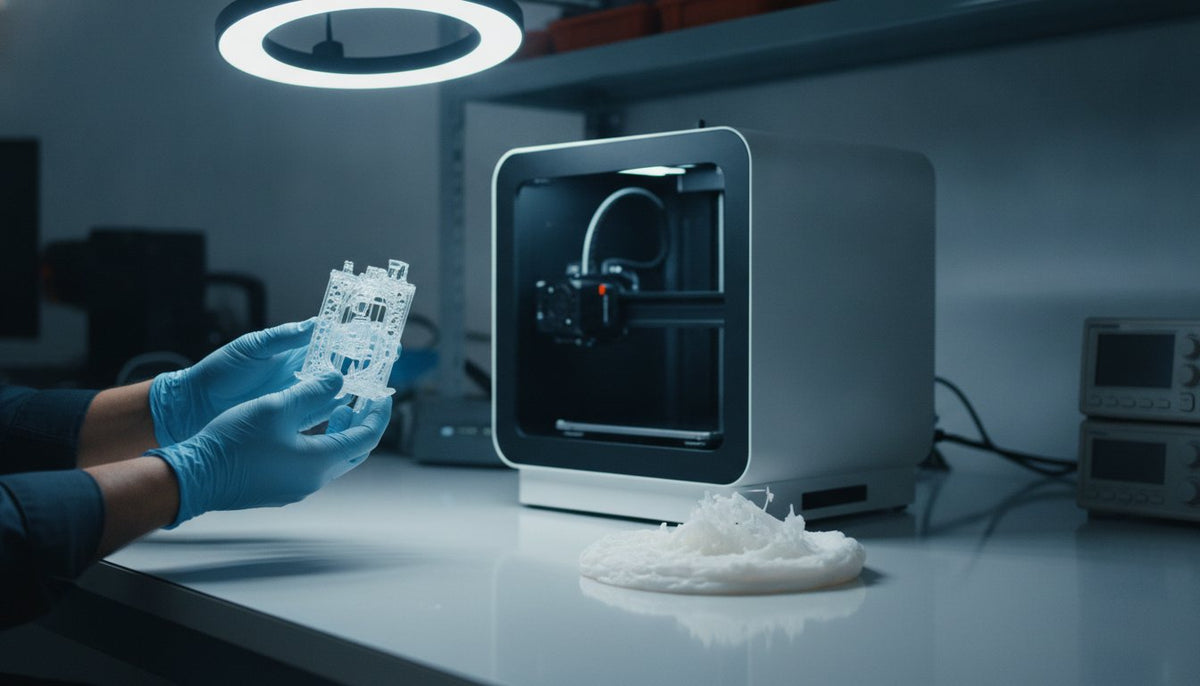
What if the difference between a failed vat of cured sludge and a museum-quality prototype isn't your hardware, but how you manage the air around it? It's incredibly frustrating to peel a half-formed model off your FEP film after hours of waiting. We've all felt the sting of wasting expensive materials when a print fails. When you're working in the UAE, the high-temperature climate adds another layer of complexity to your setup. You likely already know that consistency is the hardest part of this craft, and finding the right balance of settings often feels like a guessing game.
This guide will transform your workflow by teaching you how to diagnose and solve common resin 3d printing problems with professional precision. You'll move beyond frustrating "trial and error" to achieve consistent, high-detail results every time you hit start. We'll cover everything from mechanical calibrations and advanced slicer optimizations in software like Chitubox to specific strategies for maintaining resin viscosity in our local environment. By the end of this guide, you'll have the mastery to lower your failure rates and ensure every layer of resin contributes to a successful, professional-grade output.
Key Takeaways
- Learn how to manage the hidden physics of "peel force" to stop your models from detaching mid-cycle.
- Identify the root causes of common resin 3d printing problems like the "pancake effect" and how to fix them permanently.
- Master the environmental variables of the UAE climate to prevent high temperatures from ruining your resin's chemical balance.
- Discover the mandatory venting techniques that prevent suction cup failures when you're printing hollow, high-detail models.
- Implement a five-minute professional pre-flight checklist that ensures your hardware and software are perfectly synchronized for success.
The Anatomy of a Resin Print Failure: Why Accuracy Matters
Every successful resin print begins with a chemical reaction called photopolymerization. This process occurs when a specific wavelength of UV light triggers liquid resin to solidify layer by layer. This technology, fundamentally rooted in Stereolithography (SLA), requires a perfect balance between light intensity, material reactivity, and mechanical movement. If any of these variables drift, you'll encounter common resin 3d printing problems that result in wasted material and lost time.
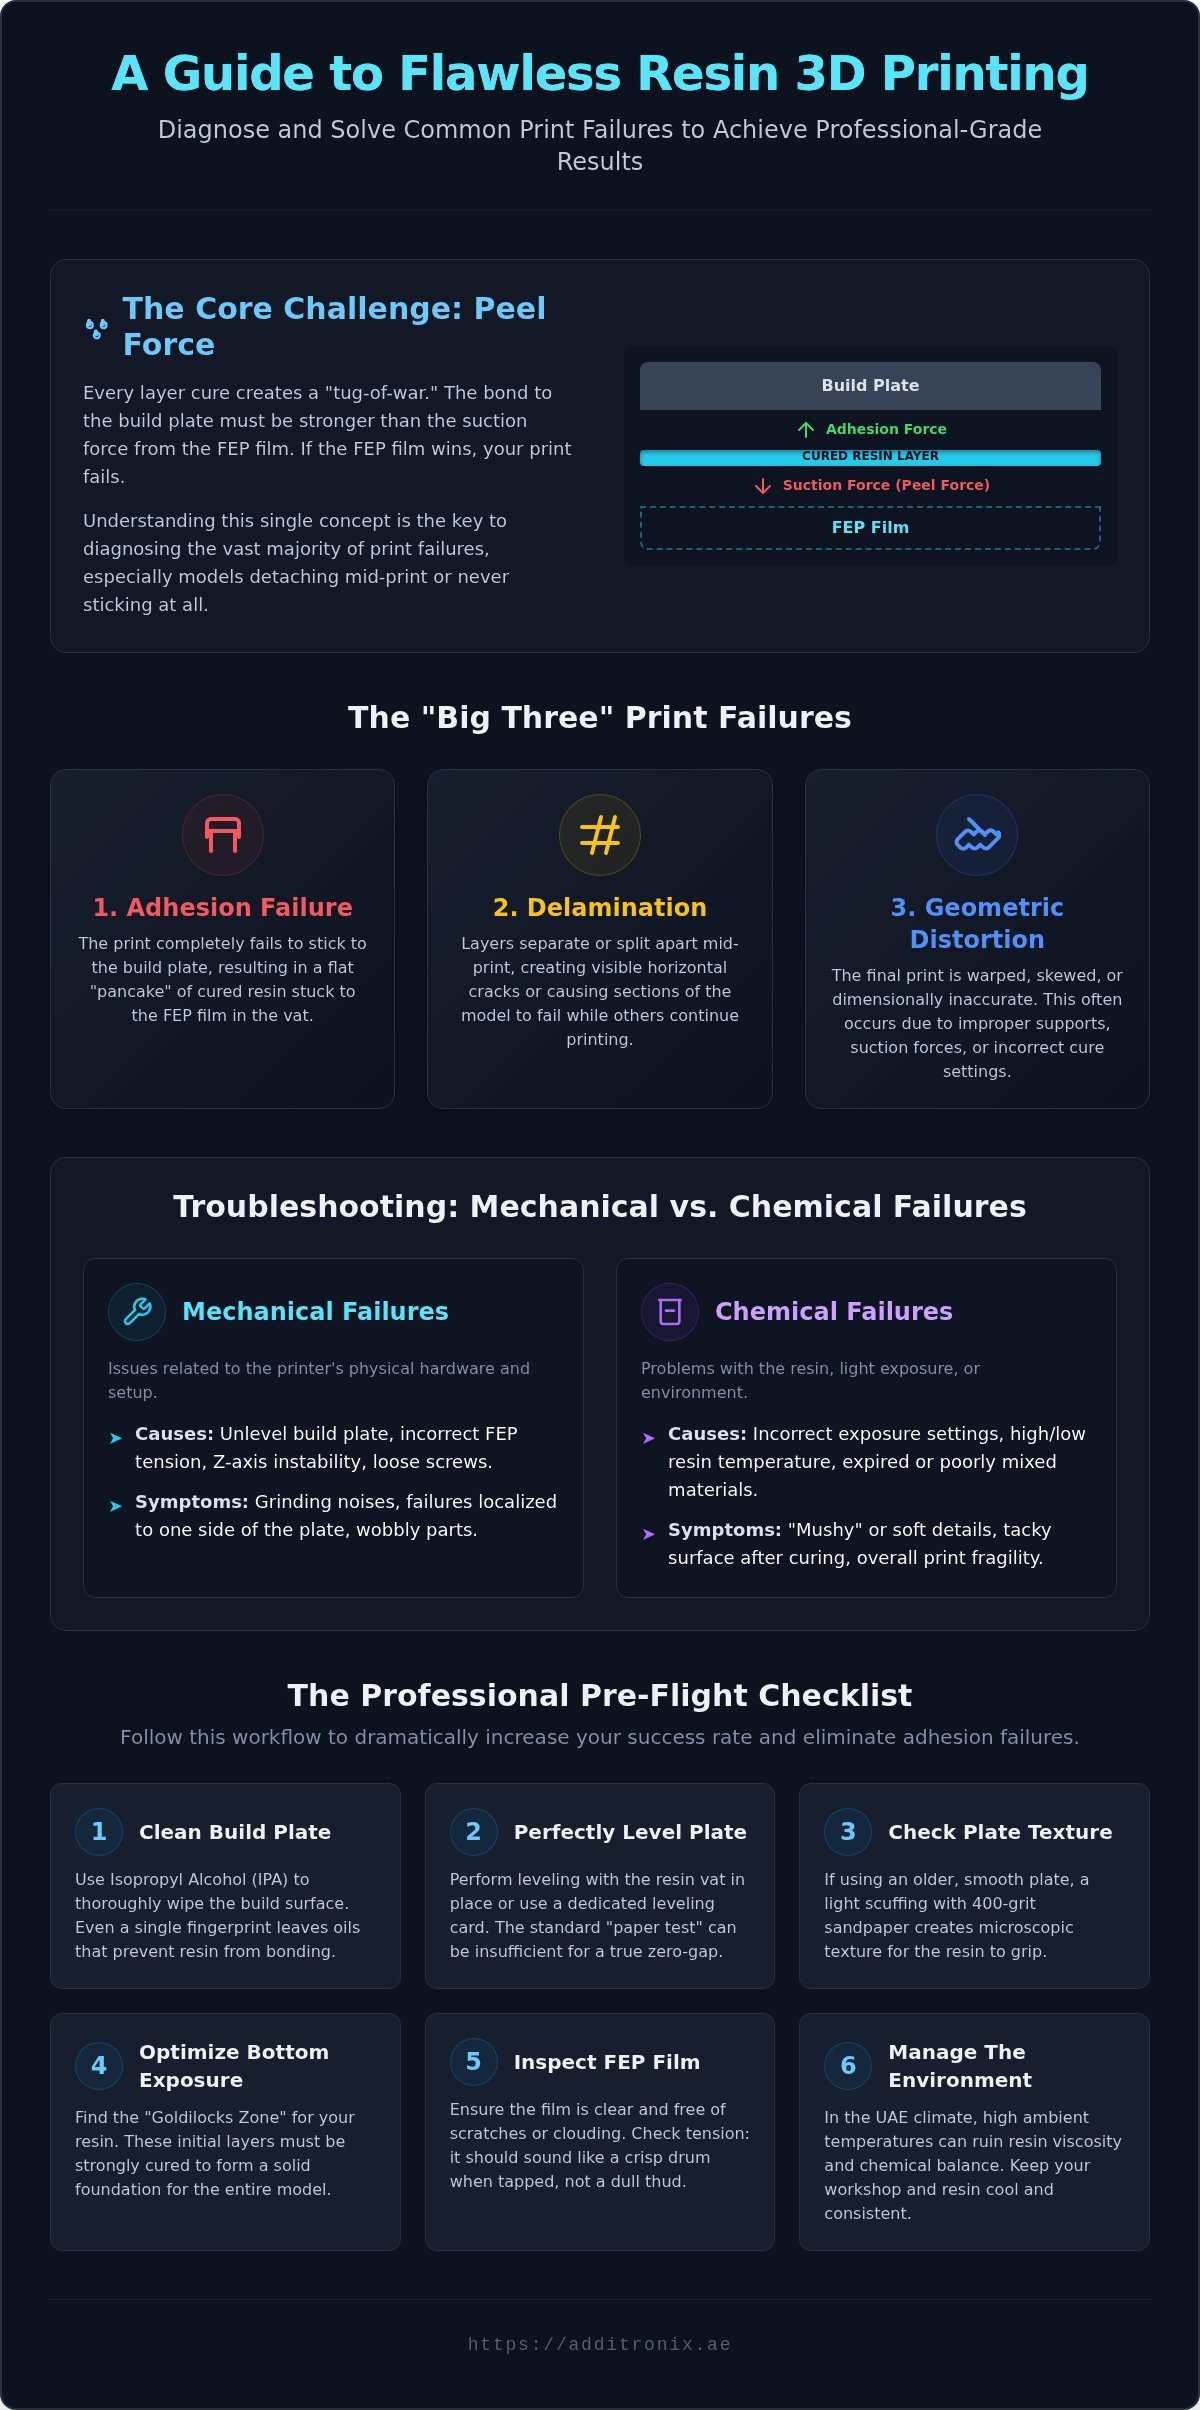
The "Peel Force" is your primary mechanical challenge. Every time the printer completes a layer, that layer is temporarily bonded to both the build plate and the FEP film at the bottom of the vat. Success depends on the build plate winning this tug-of-war. If the suction force between the FEP and the resin is too high, the print will tear away from its supports or stay stuck in the tank. Modern 2026 hardware, such as the Elegoo Saturn 3 Ultra, utilizes high-torque Z-axis motors and ultra-stable rails to manage these forces with far greater precision than entry-level machines.
You can classify most failures into the "Big Three" categories. Adhesion failures occur when the model won't stick to the build plate. Delamination happens when layers separate mid-print, creating visible cracks. Geometric distortion results in a finished print that looks warped or dimensionally inaccurate. Identifying which category your failure falls into is the first step toward a permanent fix.
Mechanical vs. Chemical Failures
Troubleshooting requires you to distinguish between hardware issues and material chemistry. Mechanical failures usually stem from an unlevel build plate, incorrect FEP tension, or Z-axis instability. If your printer makes a grinding noise or the failure is localized to one side of the plate, it's a mechanical issue. Chemical failures involve exposure settings, resin temperature, or expired materials. You can identify chemical problems by checking for "mushy" details or prints that feel tacky even after a long cure. Differentiating these two during a post-mortem saves you from adjusting slicer settings when the real culprit is a loose screw.
The Role of the FEP Film
Your FEP film is the unsung hero of the printing process. It must be perfectly clear and free of "clouding" to ensure UV light reaches the resin without scattering. Scratches or dents in the film don't just affect aesthetics; they create weak points where resin can stick too firmly, leading to common resin 3d printing problems like support failure. Proper FEP tension ensures the cured layer releases cleanly from the vat floor, directly determining whether your print continues to grow or remains stuck to the film. If your FEP sounds like a dull thud rather than a crisp drum when tapped, it's likely time for a replacement to maintain your success rate.
Solving Build Plate Adhesion: Why Your Prints Stay in the Tank
The "Pancake" effect is the most discouraging of all common resin 3d printing problems. You walk to your machine expecting a finished model, only to find a flat disc of cured resin stuck to the bottom of the vat. This happens when the suction force between the FEP film and the resin exceeds the mechanical grip of the build plate. While many guides suggest simply increasing exposure, physical preparation is usually the more reliable fix. Success depends on ensuring the build plate wins every tug-of-war against the film.
Step-by-Step Build Plate Calibration
Start with a perfectly clean surface. Isopropyl Alcohol (IPA) is your best friend here because even a single fingerprint leaves an oil barrier that prevents resin from bonding. For large-format machines like the Elegoo Saturn 3 Ultra, the standard "paper test" is often insufficient for ensuring a true "zero-gap" across the entire surface. Instead, perform your leveling with the resin vat in place or use a dedicated leveling card to account for the specific tolerances of your hardware.
Consider the texture of your build plate. Sandblasted surfaces provide a traditional mechanical key, while modern laser-etched plates offer superior grip for heavy, high-volume prints. If you're using an older, smooth plate and still face adhesion issues, a light scuffing with 400-grit sandpaper can provide the microscopic surface area needed for the resin to bite. This physical intervention often solves adhesion problems that settings alone cannot fix.
Optimizing Slicer Settings for Adhesion
Your bottom exposure settings create the foundation for the entire project. You need to find the "Goldilocks Zone" where the resin is cured enough to hold firmly but isn't so over-exposed that it becomes brittle or impossible to remove. Most professional resins require 4 to 8 bottom layers with exposure times roughly 5 to 10 times longer than your standard layers. Use transition layers to prevent the "elephant's foot" effect; this gradually reduces exposure times over 5 to 10 layers to ensure a secure bond without warping the base of your model.
Lift speed is the final piece of the puzzle. If the plate pulls away too quickly, the sudden vacuum can snap the print off the plate before it has a chance to peel. Reducing your initial lift speed to 40-60 mm/min provides a gentle release. While you optimize these mechanical variables, remember that maintaining a safe workspace is vital to mitigate health risks from chemical emissions. If you want to bypass the frustration of manual calibration, our professional installation and training services can help you master these variables immediately.
The UAE Factor: Managing Heat and Humidity in the Workshop
While most global troubleshooting resources focus on warming up resin in cold climates, professional makers in the Emirates face the "Viscosity Trap" caused by extreme ambient heat. When temperatures climb, resin becomes significantly thinner. This increased fluidity might seem helpful for flow, but it often leads to common resin 3d printing problems like loss of fine detail or "blooming," where light scatters too easily through the over-thinned liquid. Maintaining a stable environment isn't just about comfort; it's about chemical predictability.
Humidity presents a second, more invisible challenge. Resin is naturally hygroscopic, meaning it absorbs moisture from the air. In coastal areas like Dubai or Abu Dhabi, high humidity levels can lead to cloudy surface finishes or brittle parts that fail under minimal stress. If your prints look "milky" or lose their structural integrity, moisture contamination is the likely culprit. Controlling your workshop's climate to stay between 25°C and 30°C ensures the photopolymerization process remains within the manufacturer's intended specifications.
Temperature Control Strategies
Consistency beats cooling every time. Rapid fluctuations from a powerful AC unit can cause the resin's density to shift mid-print, leading to visible layer lines or delamination. Use a dedicated enclosure for your printer to shield it from direct AC drafts and dust. For long 12-hour sessions, monitor the vat temperature closely. Even if the room is cool, the internal electronics and the UV light source generate internal heat that can push the resin past its optimal curing window, affecting the final output's accuracy.
Material Handling in the Middle East
The intense UV index in the UAE requires a strict light-management protocol. Even indirect sunlight entering through a window can trigger premature polymerization in your resin tray, creating a thin skin of cured material that ruins your next project. Shelf-life also degrades faster in high-humidity environments once a bottle is opened. To ensure peak performance, follow this essential rule: "Store your resin in a climate-controlled, dark environment at a steady 23°C to preserve the reactive balance of its photoinitiators and prevent moisture-induced degradation."
Mastering these environmental variables is what separates hobbyists from professionals. If you're struggling to maintain consistent results in a challenging workspace, professional training can help you stabilize your production environment. High-quality materials like those from Elegoo and Polymaker perform best when their surroundings are as refined as their chemistry.
Mastering Supports and Delamination: Preventing Mid-Print Failure
Mid-print failures often manifest as "ragging," which are thin, cured sheets of resin, or "pitting" defects that mar a smooth surface finish. These are among the most persistent common resin 3d printing problems faced by professionals. While hardware has advanced significantly by 2026, the laws of physics remain constant. The 45-degree orientation rule is still vital because it minimizes the surface area of each layer. This reduces the peel force exerted on the model as it lifts from the FEP film, ensuring the integrity of delicate features.
Professional Support Architectures
Successful support generation requires a pre-flight mindset. You must balance support tip diameter against the structural integrity of the part. Heavy supports provide the necessary foundation for the base of the model. Light supports preserve delicate details without leaving massive scars. For complex geometries, building an interconnecting "cage" of supports distributes the load more evenly across the build plate. Don't rely solely on auto-supports. Use a hybrid approach; start with high-quality auto-algorithms in your slicer, then manually reinforce high-stress "islands" that the software might miss during its initial pass.
Managing Suction and Peel Forces
Hollow models create a "suction cup" effect. This vacuum can easily overpower your build plate's adhesion or tear the model apart. Venting holes are mandatory to equalize internal and external pressure. Always place at least two drainage holes. Position one as close to the build plate as possible to break the initial vacuum. Place another at the furthest point to allow resin to flow out during post-processing. Identifying the root cause of these common resin 3d printing problems requires a systematic look at your orientation and support density before you even fill the vat.
Reducing your lift speed to 40 mm/min during the first few centimeters of the print provides a gentle release that prevents structures from snapping. Mastering these advanced slicer workflows is the fastest way to lower your failure rates and save on material costs. If you want to eliminate the learning curve and achieve professional results faster, you can book a masterclass training session with our expert team to perfect your support strategies.
Pre-Flight Checklist: The Additronix Workflow for Success
Consistency is the backbone of professional manufacturing. By implementing a rigorous pre-flight checklist, you eliminate the variables that cause common resin 3d printing problems before you ever start the exposure cycle. A systematic approach ensures that your hardware and software are in perfect alignment. Start every project with this essential five-minute physical inspection:
- Vat Inspection: Check for cured debris or "ghost" layers on the FEP film.
- Build Plate Check: Ensure the plate is securely tightened and free of skin oils.
- Resin Verification: Confirm you have sufficient material for the entire print volume.
Digital preparation is equally critical for a successful output. Always verify that your sliced file matches the specific LCD resolution of your hardware. A mismatch here can lead to distorted geometries or failed layers. Don't overlook post-processing either. Professional results depend on a thorough wash in high-purity IPA and a precise cure cycle. Under-cured parts remain tacky and weak, while over-cured parts become brittle and lose dimensional accuracy.
Post-Failure Cleanup
Failures are learning opportunities, but they require immediate action to protect your hardware. Use the "Clean VAT" function on your printer to cure a single thin sheet of resin across the entire FEP. This allows you to peel away every microscopic debris particle in one piece. If you suspect a major failure, filter your resin through a 190-micron mesh before the next use. Inspect your LCD screen for any leaks or dead pixels that could cause recurring defects. Additronix maintains a full stock of genuine spare parts, including FEP films and high-resolution LCDs, to ensure your workshop never faces extended downtime.
Elevate Your Output with Professional Tools
The Elegoo Saturn 3 Ultra represents the pinnacle of 2026 desktop resin technology. It offers the stability and resolution required for industrial-grade prototypes while remaining accessible to the modern maker. However, high-end hardware is only half of the equation. Professional installation and training bridge the gap between owning a machine and mastering a production ecosystem. Our masterclasses help you navigate common resin 3d printing problems and optimize your specific slicer profiles for maximum efficiency. To skip the trial-and-error phase and start producing flawless outputs today, Book a Professional 3D Printing Training Session with Additronix.
Master Your Production Workflow Today
Mastering the intricacies of resin printing requires a shift from reactive fixes to proactive environmental and mechanical control. By understanding the physics of peel forces and the chemical impact of the UAE climate, you've already taken the first step toward professional-grade consistency. You now have the tools to identify common resin 3d printing problems like adhesion failures or delamination before they waste your time and materials. Success in 2026 isn't just about the hardware; it's about the precision of your workflow and the quality of your support system.
As an Authorized UAE Distributor for industry leaders, we provide more than just equipment. We offer a comprehensive ecosystem including fast nationwide delivery and expert post-purchase support to ensure your long-term success. Whether you're refining a hobbyist setup or scaling an industrial workshop, we're here to help you achieve flawless results every time you hit start.
Explore Authorized Elegoo & Creality Resin Printers at Additronix and start your journey toward 3D printing mastery. Your next masterpiece is only a few calibrated layers away.
Frequently Asked Questions
Why is my resin print sticking to the FEP film instead of the build plate?
Your print sticks to the FEP because the suction force between the film and the resin exceeds the bond to the build plate. This is one of the most common resin 3d printing problems, often caused by insufficient bottom exposure times or a build plate that isn't perfectly level. You should increase your bottom exposure by 10% and ensure your build plate is clean and scuffed with sandpaper to provide better mechanical grip.
How often should I replace the FEP film on my resin printer?
You should replace your FEP film whenever it becomes cloudy, severely dented, or loses its drum-like tension. While some users change it every 30 prints, professional makers monitor light transmission quality. A worn film scatters UV light, leading to soft details and failed layers. Maintaining a clear, tight FEP is essential for consistent results on high-performance machines like the Elegoo Saturn 3 Ultra. Replacing it early prevents catastrophic leaks and screen damage.
Can I reuse resin after a failed 3D print?
You can reuse resin after a failed print, but you must filter it through a 190-micron mesh first. Failed prints often leave microscopic cured fragments or "ghost" layers floating in the vat. If you don't remove these, they will be pressed into the FEP by the build plate during the next print, potentially puncturing the film or damaging your LCD screen. Always use your printer's "Clean VAT" function to remove surface debris safely before starting again.
What is the ideal temperature for resin 3D printing in the UAE?
The ideal temperature for resin 3D printing in the UAE is between 25°C and 30°C. While resins flow better at higher temperatures, exceeding 30°C can cause the material to thin excessively, leading to light bleed and loss of fine detail. Maintaining a stable, climate-controlled workshop prevents the "Viscosity Trap" and ensures that your chemical exposure times remain predictable. This temperature range is critical for achieving the high-detail outputs that professional industrial users demand.
Why are there horizontal lines or layer shifts on my resin models?
Horizontal lines or layer shifts usually indicate mechanical instability or Z-axis "wobble." Check that your lead screw is properly lubricated and that the build plate is firmly tightened before every print. If the lines appear at regular intervals, it might be a sign of a bent Z-rod or loose motor couplings. Ensuring your printer is on a stable, vibration-free surface is a simple fix for many common resin 3d printing problems related to geometric accuracy.
How do I prevent my resin prints from being brittle after curing?
To prevent brittle prints, you must optimize your post-processing cure times and choose the right resin for your specific application. Over-curing under UV light causes the polymer chains to become too rigid, leading to snapping. Most standard resins only require 2 to 5 minutes in a curing station. If you require functional strength or impact resistance, consider switching to specialized engineering resins, which are formulated to maintain structural flexibility after a full cure.
Is it necessary to use a screen protector on my resin 3D printer?
It's highly recommended to use a screen protector on your resin 3D printer to safeguard the expensive LCD from accidental resin leaks. A single pinhole in your FEP film can allow liquid resin to cure directly onto the screen, which is nearly impossible to remove without causing permanent scratches. Many modern printers come with pre-installed protectors, but adding an extra layer is a low-cost insurance policy that protects your hardware's long-term production value.
What are 'ragging' defects and how do I stop them?
"Ragging" refers to thin, flap-like sheets of cured resin that appear on or around your model. This defect is often caused by light leakage through the LCD or "parasitic" curing from excessive exposure times. You can stop ragging by lowering your normal exposure settings by 0.2 seconds and checking your sliced file for digital artifacts. It can also occur if your resin is contaminated with cured particles, so always filter your vat after a failed print.