
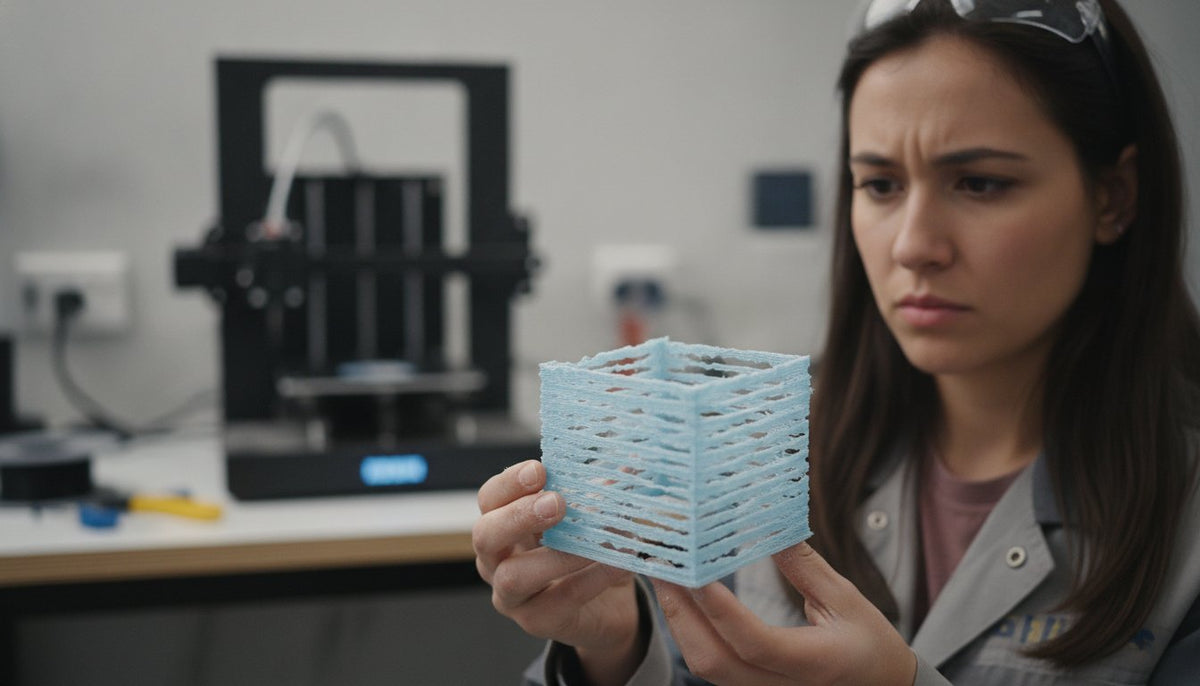
Under-extrusion isn't just a minor technical glitch. It's a fundamental breakdown in the harmony between your hardware's thermal limits and your material's flow integrity. You've likely felt the frustration of watching a twelve-hour print turn into a brittle, "swiss cheese" mess because of inconsistent layer bonding. It's a waste of time and premium filament that can stall any creative or industrial project. If you're tired of guessing whether the issue lies in a hardware clog or a software setting, learning how to fix 3d printer under extrusion is the essential next step in your manufacturing journey.
We understand that professional-grade results require more than just basic fixes. You deserve a machine that operates with total reliability, whether you're using a Bambu Lab X1-Carbon or a Creality K1 Max. This guide promises to transform your workflow by providing a structured, diagnostic approach to material flow. We'll explore critical hardware checks, nozzle maintenance, and the specific slicer calibrations within Bambu Studio or Orca Slicer that eliminate gaps. By the end of this article, you'll have the expertise to achieve smooth surface finishes and the strong structural integrity required for high-performance parts.
Key Takeaways
- Identify the specific symptoms of material starvation to distinguish between simple hardware clogs and complex slicer configuration errors.
- Master the essential mechanical steps on how to fix 3d printer under extrusion by maintaining a clear filament path and calibrating extruder gear tension.
- Optimize the relationship between nozzle temperature and print speed to ensure consistent melt zones during high-speed printing operations.
- Protect your material integrity against the UAE's environmental factors by utilizing moisture-resistant storage and premium filaments like Polymaker PolyLite PLA.
- Execute advanced E-step calibrations and hardware upgrades to ensure your machine delivers the precise volume of plastic required for professional results.
Identifying Under-Extrusion Symptoms in Your 3D Prints
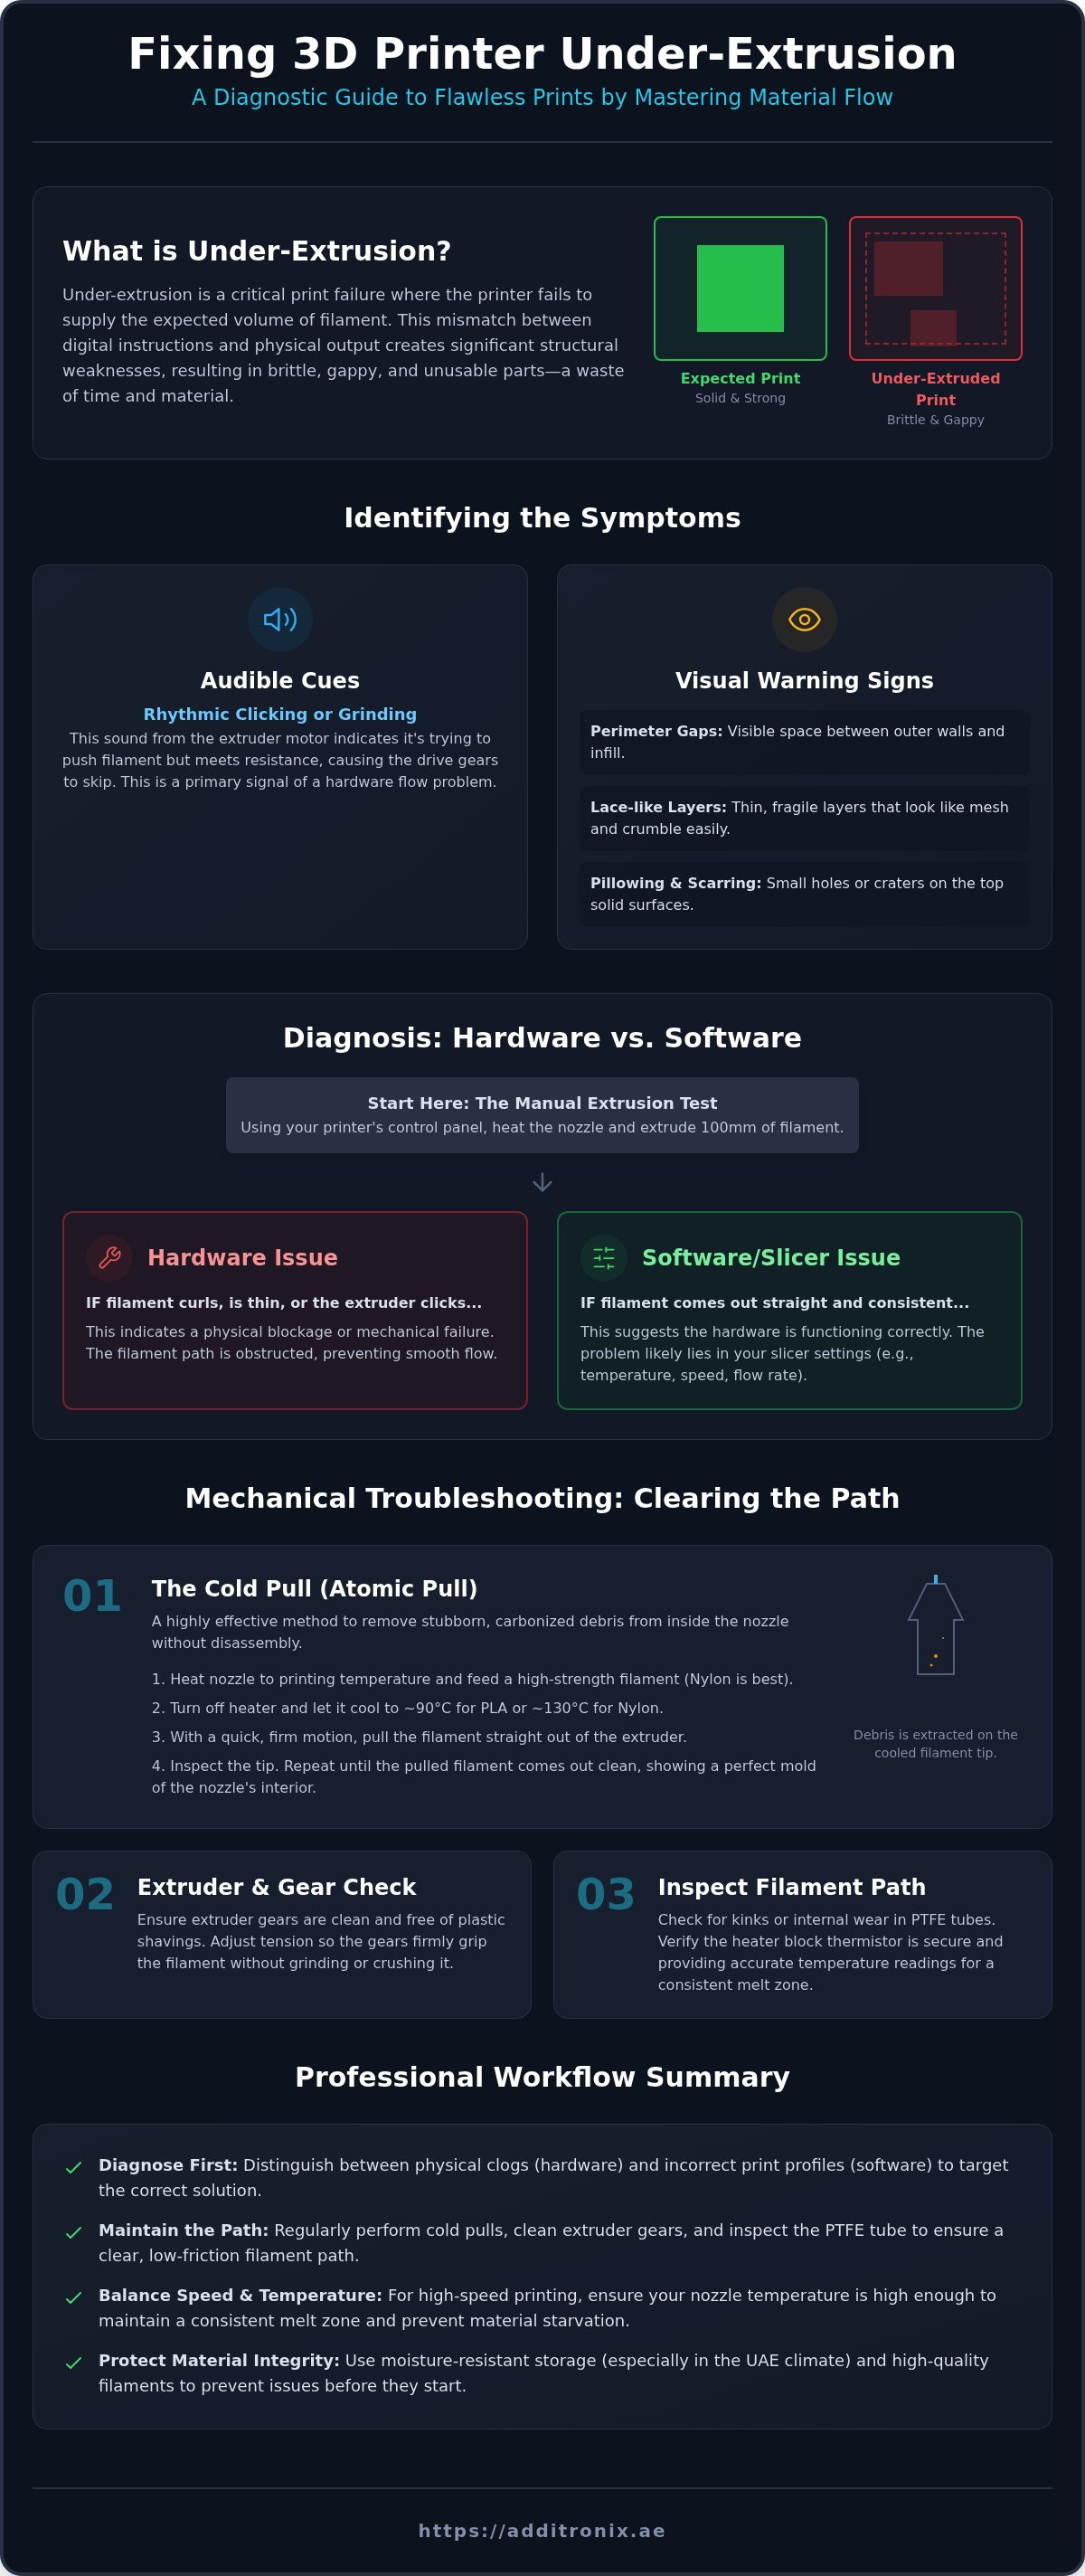
Under-extrusion occurs when your printer fails to supply the expected volume of plastic for the current layer. In the context of Fused filament fabrication (FFF), this mismatch between the slicer's digital instructions and the physical output creates significant structural weaknesses. You'll typically see this manifest in two distinct patterns. Global under-extrusion affects the entire model, making the entire object look consistently sparse or "undercooked." Localized under-extrusion appears only in specific areas, such as on the top surfaces or immediately following a retraction move. Learning how to fix 3d printer under extrusion starts with recognizing these visual and audible cues before they ruin a high-priority project.
One of the most reliable mechanical warnings isn't visual; it's audible. Listen for a rhythmic clicking or grinding sound coming from your extruder motor. This noise indicates that the motor is attempting to push filament, but resistance in the path is causing the gears to skip over the material. This back pressure is a primary signal that your hardware is struggling to keep up with the requested flow rate.
Visual Warning Signs to Look For
Before you disassemble your hardware, examine your failed prints for these specific defects:
- Perimeter Gaps: Visible space between the outer walls and the internal infill patterns suggests the nozzle isn't depositing enough material to bridge the gap.
- Lace-like Layers: Thin, fragile layers that look like mesh or lace. These parts often feel brittle and will crumble under minimal finger pressure.
- Pillowing and Scarring: Small holes or "pillows" on the top surface. This happens when the top layers are too thin to successfully bridge over the infill, leaving the internal structure exposed.
The Root Causes: Hardware vs. Software
Successful troubleshooting requires you to distinguish between a physical blockage and a digital setting error. A simple way to test this is by using your printer's control panel to manually extrude 100mm of filament into open air. If the filament comes out straight and consistent, your issue likely resides in your slicer settings. If it curls, comes out thin, or triggers that clicking sound, you're facing a hardware obstruction.
High-speed machines like the Creality K1 Max are particularly prone to these issues. These printers demand high flow rates that can easily outpace a standard nozzle's melting capacity. When you push for speed without adjusting your thermal limits, you'll inevitably encounter material starvation. Understanding these symptoms is the first step in mastering how to fix 3d printer under extrusion and ensuring your output meets professional standards every time.
Mechanical Troubleshooting: Clearing the Extrusion Path
Mechanical failures represent the most common reason for material starvation. When you are learning how to fix 3d printer under extrusion, your first priority must be the physical path from the spool to the nozzle tip. Any resistance along this route forces the extruder motor to work harder, eventually leading to the skipping sounds mentioned previously. PTFE tube friction is often a silent culprit. Even a small kink or internal wear in the tubing creates enough drag to resist the motor's push, resulting in inconsistent flow. You should also verify your heater block integrity. If the thermistor is loose or reporting inaccurate data, the actual melt zone might be much cooler than your digital settings suggest, preventing the plastic from liquefying properly.
The Cold Pull Method (Atomic Pull)
The cold pull is a highly effective, non-invasive technique to extract carbonized debris from inside your nozzle. Start by heating your nozzle to its standard printing temperature and inserting a high-strength filament. Nylon is the professional choice due to its high tensile strength and heat resistance, though PLA is a functional alternative. Once the material is flowing, turn off the heater and let the nozzle cool to approximately 90°C for PLA or 130°C for Nylon. When the target temperature is reached, pull the filament out with a quick, firm motion. A "clean" pull will show the exact interior geometry of the nozzle tip, often bringing out the dark, burnt specks that were causing the obstruction. If the end of the filament is still covered in dark residue, repeat the process until the plastic comes out pristine.
Extruder Tension and Gear Maintenance
Extruder gears require regular inspection to maintain a reliable grip. Over time, filament dust and shavings accumulate within the gear teeth, significantly reducing their ability to grab the material. Use a stiff brush or compressed air to clear this debris regularly. While cleaning, check the teeth for physical wear. If they appear rounded or smooth, the gears can no longer provide the necessary torque and must be replaced. Adjusting the tension screw is equally critical. If it's too loose, the gears will slip; if it's too tight, they will deform the filament and create even more friction. Aim for a tension level that leaves slight, visible indentations on the filament without flattening it. If you find these mechanical adjustments daunting, Additronix offers professional training and hardware optimization services to ensure your equipment is always performing at its peak.
Slicer Optimization: Tuning Your Digital Print Profile
Once you've confirmed that your hardware path is clear, the next step in learning how to fix 3d printer under extrusion is refining your digital instructions. Slicer settings act as the blueprint for material delivery. If these instructions don't account for the physical properties of your filament, you'll face consistent material starvation despite having a perfect nozzle. Start by verifying that your filament diameter is set exactly to 1.75mm. Even a minor discrepancy here leads to a significant volume deficit. Modern slicers also use advanced compensations like Pressure Advance or Input Shaping to manage flow during rapid transitions. If these are poorly calibrated, you'll see thinning at corners or immediately after long travel moves.
Adjusting Flow Rate and Multiplier
The Extrusion Multiplier is your primary tool for fine-tuning the volume of plastic exiting the nozzle. To calibrate this, print a single-walled "flow cube" with no infill and no top layers. Measure the wall thickness with a digital caliper and compare it to the "Line Width" specified in your slicer. Use the following logic to calculate your adjustment factor:
- The Formula: Divide the Expected Wall Thickness by the Actual Measured Thickness to find your new multiplier.
- The Limit: Avoid arbitrary increases. If you find yourself pushing the multiplier above 1.10, which is a 10% increase, you're likely masking a deeper mechanical issue or a temperature deficit.
- The Benefit: Proper flow calibration ensures that perimeter walls bond perfectly. This creates parts with superior structural integrity and a professional surface finish.
Balancing Print Speed and Nozzle Temperature
Speed and temperature share a direct, inverse relationship. As you increase print speed, the filament spends less time in the melt zone, which often leads to under-extrusion. Understanding your hotend's Volumetric Flow Limit is essential for high-performance printing. If you're using the "Rage Mode" on a Bambu Lab printer, you should increase your nozzle temperature by 10-15°C to compensate for the reduced residence time of the plastic. This ensures the material reaches a fully liquid state before it's forced through the nozzle. For users of third-party materials like Polymaker PolyLite PLA, utilizing the "Generic" profile in Bambu Studio often provides a safer volumetric ceiling. This prevents flow-related failures during high-speed operations by capping the speed at a level the heater block can reliably handle.
The Filament Factor: UAE Climate and Material Quality
Environmental conditions in the UAE present unique challenges that can compromise even the best hardware. In regions like Dubai or Abu Dhabi, high ambient humidity is a primary driver of material degradation. Most 3D printing filaments are hygroscopic, meaning they actively absorb moisture from the air. When water molecules enter the plastic, the filament's diameter can swell slightly. This microscopic increase in size creates significant friction as the material passes through the PTFE tubing or the heat break. If you're struggling with how to fix 3d printer under extrusion, you must look beyond your settings and evaluate your material's physical state. Using premium materials like Polymaker PolyLite PLA can significantly reduce these risks, as higher-quality manufacturing ensures more consistent diameter tolerances from the start.
Heat exposure is another critical factor. Storing filament in non-climate-controlled environments can lead to thermal degradation, making the plastic brittle. Brittle filament often snaps inside the extruder or develops "flat spots" where the gears have ground away the material. This results in a total loss of extrusion or intermittent flow that ruins the structural integrity of your parts. Maintaining a stable environment for your materials isn't just about storage; it's about protecting your investment in every print.
Moisture Impact and Drying Solutions
Identifying "wet" filament is straightforward if you know what to listen for. During a print, listen for faint popping or crackling sounds at the nozzle. This is the sound of absorbed water turning into steam and expanding rapidly, which displaces the molten plastic and leaves tiny voids in your layers. You might also see actual steam or inconsistent wisps of smoke. To resolve this, use a dedicated filament drying station or the "drying" utility on your Bambu Lab X1-Carbon's heated bed. Always store your spools in airtight containers with fresh desiccant to prevent moisture re-entry, especially during the more humid summer months.
PTFE Tube Resistance in Multi-Material Systems
Multi-material systems like the Bambu Lab AMS add layers of complexity to the extrusion path. Because the filament must travel through several meters of PTFE tubing before reaching the toolhead, any internal friction is amplified. Check your setup for sharp bends or "kinks" in the tubes. These restricted curves increase the torque required from the extruder motor, often leading to under-extrusion during rapid color changes. Regularly clean the internal rollers and feeders of your AMS to remove filament dust that can cause slippage. If you want to eliminate these variables entirely, source premium Polymaker filaments from Additronix to ensure your multi-material prints are always flawless and reliable.
Advanced Calibration and Professional Maintenance
Mastering the digital and environmental factors of 3D printing is essential, but the most persistent flow issues often stem from the foundational logic of your hardware. If your extruder motor isn't physically moving the exact volume of plastic requested by the firmware, every other adjustment becomes a temporary workaround. This advanced level of calibration is the final frontier in learning how to fix 3d printer under extrusion. By ensuring your machine's mechanical steps align perfectly with its digital commands, you unlock the ability to produce industrial-grade parts with total reliability. Keeping your firmware updated is also vital, as manufacturers frequently release optimized extrusion algorithms that improve flow consistency on machines like the Elegoo Saturn 3 Ultra or the Bambu Lab X1-Carbon.
Calibrating E-Steps for Precision
E-steps are the fundamental multiplier for extruder motor steps per millimeter. When this value is incorrect, your printer will consistently under-extrude or over-extrude regardless of your slicer settings. To perform a 100mm test, use a digital caliper to mark exactly 120mm of filament from the entry point of your extruder. Use your printer's interface to command an extrusion of 100mm. After the motor stops, measure the remaining distance to your mark. If you have 30mm left, your printer only pulled in 90mm of material. Use this formula to correct the error: (Current E-steps * 100) / Measured distance = New E-steps. Entering this new value into your printer's EEPROM ensures that when you ask for 100mm of filament, you receive exactly 100mm of flow.
When to Replace Spare Parts
Even a perfectly calibrated machine will fail if its components have reached the end of their service life. Nozzle wear is often invisible to the naked eye but can significantly alter internal geometry and flow resistance. If you frequently print with abrasive materials, upgrading from stainless steel to a hardened steel nozzle is a strategic move that preserves your diameter tolerance over hundreds of hours. You should also choose your nozzle diameter based on your specific project goals. While a 0.4mm nozzle is the standard for detail, a 0.6mm nozzle allows for higher volumetric flow and reduces the likelihood of clogs during long, high-speed prints.
Watch for signs of heat creep, such as the cooling fan becoming louder or filament jamming only after several hours of printing. This suggests the heat break is no longer effectively isolating the melt zone, causing filament to soften prematurely. If these complex hardware interactions continue to cause frustration, expert guidance can help you skip the steep learning curve. If you need professional help, you can Book a 3D printer installation or training session with Additronix to ensure your equipment is optimized for peak performance from day one.
Achieve Flawless Print Quality Today
Mastering the balance between hardware precision and software calibration is the only way to eliminate material starvation from your workflow. You've learned that understanding how to fix 3d printer under extrusion requires a holistic approach; identifying visual symptoms, maintaining a clear mechanical path, and optimizing slicer profiles for the UAE's unique climate. By implementing advanced E-step calibrations and selecting high-quality materials, you transform your printer from a source of frustration into a reliable tool for innovation. Whether you're refining a desktop setup or managing an industrial fleet, consistent extrusion is the foundation of every successful project.
As an authorized distributor for Bambu Lab and Creality in the UAE, Additronix is committed to your long-term success. We provide more than just hardware; we offer a comprehensive ecosystem including expert installation, professional training, and fast nationwide delivery. Don't let technical hurdles stall your creativity or production. Shop Premium 3D Printer Spare Parts and Filaments in the UAE to secure the components you need for perfect results. Start your next print with total confidence and watch your concepts become high-performance reality.
Frequently Asked Questions
Why is my 3D printer clicking and not extruding?
Clicking occurs when the extruder motor skips because it cannot push filament through the nozzle. This is usually caused by a nozzle clog, too low temperature, or excessive friction in the PTFE tube. The motor's gears lose grip or stall due to back pressure. Cleaning the nozzle and checking for mechanical obstructions are the first steps in learning how to fix 3d printer under extrusion.
Can a low nozzle temperature cause under-extrusion?
Inadequate heat prevents the filament from reaching its optimal liquid state. If the plastic is too viscous, the extruder cannot force it through the small nozzle opening at the required speed. This creates resistance that leads to sparse layers and gaps. Always verify your material's recommended temperature range, especially when printing at high speeds on machines like the Creality K1 Max.
Is under-extrusion the same as a clogged nozzle?
A clogged nozzle is just one specific cause of under-extrusion. Under-extrusion is a broad term for any situation where less material is deposited than intended. While a physical blockage in the nozzle tip often results in this issue, other factors like incorrect slicer settings, worn extruder gears, or moisture-damaged filament can produce identical symptoms without a physical clog being present.
How do I know if my filament is too wet to print?
Listen for audible popping or crackling sounds as the filament exits the nozzle. These noises are caused by absorbed water turning into steam. You might also notice a rough surface finish, excessive stringing, or visible steam rising from the heater block. In the UAE's high humidity, storing your Polymaker PolyLite PLA in airtight containers with desiccant is essential for maintaining reliable flow.
Does print speed affect under-extrusion on a Bambu Lab printer?
Higher print speeds directly increase the demand for molten plastic. If you push a Bambu Lab X1-Carbon to its maximum speed without increasing the nozzle temperature, the heater block may fail to melt the filament fast enough. This leads to material starvation and weak layers. Utilizing the "Generic" material profiles in Bambu Studio helps manage these volumetric flow limits to prevent failures during rapid operations.
What is the extrusion multiplier and when should I change it?
The extrusion multiplier is a slicer setting that scales the volume of plastic extruded. You should adjust it when your measured wall thickness doesn't match your digital settings. If a single-walled cube is thinner than intended, increasing the multiplier by one to five percent can help. If you need to increase it beyond ten percent, you should investigate mechanical issues or temperature deficits instead.
Can a worn-out extruder gear cause gaps in my prints?
Worn or dirty extruder gears are a major cause of intermittent flow. If the teeth are rounded or filled with plastic dust, they lose their ability to grip the filament consistently. This leads to slippage, where the motor turns but the filament stays still or moves slowly. Regular cleaning and replacing gears that show visible smoothing are vital steps when determining how to fix 3d printer under extrusion.
How often should I calibrate my printer's E-steps?
You should calibrate your E-steps whenever you make a significant mechanical change to the extrusion system. This includes replacing the extruder motor, changing the gear assembly, or performing a major firmware update. Unlike flow rate, which is material-specific, E-steps are a hardware-level calibration. Checking this value once every few months ensures your motor continues to move the exact length of filament requested for every layer.